Application of Tape-in Extensions
Instructions on How to Apply Tape-in Extensions
Tape-in extensions are placed into your hair using the “sandwich” method. What this means is that you will part a strand of your hair with a comb and attach a strand of tape to it from above and below.


Make sure that you attach both the upper and lower strands of your skin wefts to the base of the strand at the same distance from the scalp. This is the only way to make your hair extensions look symmetrical.

For the attachment of our real human hair tape-in extensions, you can use our miniature straightening iron. Its dimensions and the temperature of the ceramic plates are perfectly made for our skin wefts. Should you have any problems attaching your tape-in extensions by yourself, please ask your hairdresser for help.
Tape-in Hair Extensions – A Step-by-Step Guide
STEP 1
Part your hair with a comb and put the upper part of the hair up with a clip so that it does not interfere with the next steps.
STEP 2
Take a strand of hair from your tape-in extensions set and stick it to the top side of your own parted hair. The distance to the scalp should be about 2 millimeters. Make sure that the tapes are only attached to the hairs directly adjacent to each other.
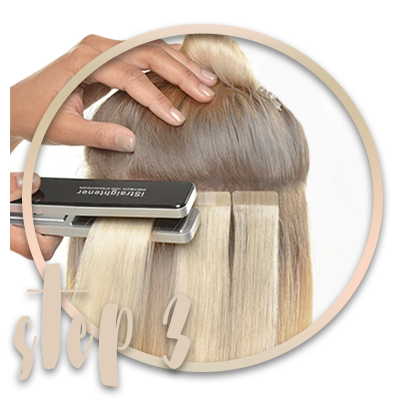
STEP 3
Take another strand of hair and glue it to the underside of your own hair strand. Here too, the distance to the scalp should be about 2 millimeters in order to achieve an even result. Then you can let your hair down again.
STEP 4
Work your way up following steps 1 through 3 on the back of the head. Then do the same to the sides of your head.
 Australia
 United States
 (FR)
(FR)
 France
 Germany
 Austria
 Poland

